The sun returns to Grise Fiord, Canada’s northernmost village, on February 11. Things happen quickly from there. March 31 is the last day for almost five months that you will see stars at that latitude. By early May, there is only one f-stop difference between noon and midnight.
As the arctic adventure season gets underway, here is a potpourri of useful and interesting travel tidbits, with a focus on the Canadian North.
Shipping Gear
On one of my first expeditions to Ellesmere Island, my partner and I showed up at the airport in Toronto with 12 pieces of baggage. The airline clerks seemed interested in our project and kindly waived everything through. Needless to say, that doesn’t happen any more.
So what is the best way to ship your gear to the Canadian Arctic? A typical adventurer’s first thought is to approach local airlines like First Air for sponsorship, but you’d need a more sophisticated strategy than promising them “exposure”. They’ve heard it all, from the best.
It’s important to get as much gear north as possible before you yourself fly, because baggage is often bumped on these small northern planes. “Sorry,” they say, “the plane’s maxed out, we’ll send it on the next available flight” — which could be two weeks if the weather turns bad, while you sit and stew in the little village hotel at $400 a night.
Sending gear ahead of time by air cargo is the most expensive option. The cheapest, most reliable way, at least in this country, is by old-fashioned snail mail. Canada Post allows parcels up to 30kg in weight and up to two metres in length. So you can even mail your skis. The only thing you can’t send is a firearm for polar bear protection. Firearms must go either with you, as part of passenger luggage, or by air cargo.
Recently, I’ve been shipping several boxes to little Clyde River on Baffin Island in preparation for an expedition. A 60x40x30cm Rubbermaid container weighing 25-27 kilos costs about $175 from western Canada and takes two to three weeks to arrive. For a little extra, you can send it Xpresspost, which gets there in half the time.
A Disadvantage with Tunnel Tents

Camp Buried Alive. Photo: Jerry Kobalenko
Dome tents have more space, but tunnel tents resist wind better. It’s obvious that you should set them up nose into the wind. But sometimes, the wind picks up or shifts direction during the night, striking the tent crosswise. Then tunnel tents have a problem. While they resist the wind itself, drifting snow swiftly piles up on the windward side. You have to go outside to shovel every three or four hours. If not, the tent will be buried, even damaged, as the snow presses forcefully against the nylon walls.
The photo above shows the tail end of a fierce three-day blow on eastern Ellesmere Island. Downwind of the tent, everything was clear, but upwind, sleds, ski poles and snow stakes were buried beneath 1.5metres of rock-hard windpack. It took six hours of shoveling to unbury everything. The pit we left behind looked like a bomb crater, below.

Photo: Jerry Kobalenko
In the High Arctic, at least, you typically shovel under the midnight sun. But once, this happened in the low Arctic, and I had to shovel for an hour in the dark. My headlamp, perfectly usable around camp, was not strong enough to see if a polar bear was approaching. Nothing happened, but it was an uncomfortable experience, and I had to glance around constantly, shotgun slung over my back. Since then, if I’m in polar bear country where it gets dark at night, I bring a headlamp with serious reach.
Polar Mirages


Arctic mirages. Photos: Jerry Kobalenko
In 1818, British explorer John Ross, tasked with finding the Northwest Passage, turned back west of Baffin Island when he claimed he saw something he called the Croker Mountains blocking the way. His officers, including Lieutenant William Parry, were not convinced. It’s commonly stated that Ross was fooled by a polar mirage. His reputation never recovered, especially when Parry returned to the Arctic the following year with his own command and sailed west unimpeded for hundreds of kilometres.
Likewise, in 1906, American explorer Robert Peary claimed to have spotted land north of Ellesmere Island. We know now that there’s nothing there but the Arctic Ocean. Peary, who had a history of making inaccurate statements that helped fund his subsequent expeditions, was likewise — too charitably, in my opinion — deemed a victim of a mirage.
Polar mirages are different from the watery shimmers on hot summer pavement familiar to all of us. Those are caused by hot air near the ground and cooler air above, creating a reflected view of the sky. Polar mirages, on the other hand, occur when cold air near the surface and warmer air above form a refracting lens. You need a distant object to experience a polar mirage — an iceberg, some pressed-up sea ice, even a far point of land. Sometimes the object is stretched upward like taffy; other times, it’s flipped upside-down.
Some mirages, like the middle photo above, are so elaborate that you might almost mistake them for land. This mirage actually occurred at the very spot Peary claimed to have seen his imaginary island. However, mirages are in constant flux; within seconds, this one deformed and disappeared. No experienced observer would be taken in by it. Even in the 19th century, sailors were used to these mirages. One whaler, the remarkable natural historian William Scoresby, once saw an upside-down miraged ship that was so detailed that he recognized it as his father’s vessel.
Topo Maps
You can still buy government-issued topographic maps for about $14 each from a map store, but why bother, if you can print your own? Hi-res digital files of standard 1:50,000 and 1:250,000 topos are free online. If you’re handy with a photo editing program, you can crop and combine topos, so that you only have the sections you need. On long-distance expeditions, involving dozens of maps, you can save weight and space by printing double-sided.
Just make sure that your self-printed maps are big enough to read easily. On 1:250,000 topos, each lined square on the map covers 10km. The printed square should be at least 3.5cm per side. On 1:50,000s, each square covers 1km and should be about 1cm per side.
1:500,000 maps aren’t suitable for navigating but give a good overall perspective on a long-distance route. Although you can also download this scale from the link above, I prefer buying the two-sided paper maps that bush pilots use. Called VFR (Visual Flight Rules) charts, they can be ordered online.
Finally, the information on topo maps, including compass declination, is often years or even decades old. While the legend gives a rough formula for updating declination, you can find out the exact current figure simply by putting the lat/long of where you’re going into this government site.
Compass mirror

Photo: Jerry Kobalenko
While you don’t need a mirror on your compass for navigating, it does let you check yourself for frostnip, especially while traveling. A quick glance shows the distinctive waxy whiteness and confirms that you need to warm a cheek or nose with a bare hand for a few seconds.
Skiing vs. walking

Photo: Jerry Kobalenko
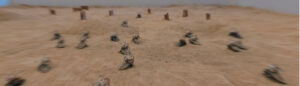
Unless you’re a very good skier, it’s faster to haul a sled on foot rather than on skis, if the snow is hard enough to support you. For this reason, I always bring a pair of light mukluks specifically for walking. With Berwin-type bindings, you can also ski in this footwear.